Building and flight report of
Horten Vc from Engel Modellbau & Technik |
|||||||
| Day 3 | Day 4 | Day 5 | Day 6 | Day 7 | |||
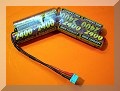
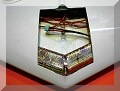
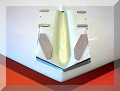
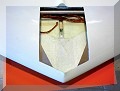
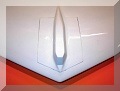
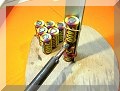
Day 3: Today the Accu was soldererd. First I sanded the poles of the single accu cells. Then the poles were separately soldered. For Inline soldering I use a wooden plate with a fixed aluminium edge strip. With this tool I've made the best experiences. The bottom cell is fixed with a rubber band, the soldering bit is placed between the 2 poles, the poles are heatened, the soldering bit was pulled out and the 2 cells immedeately connected. Ready. The accu should be shaped like the angle of the leading edge. The 4 sections each with 2 cells are accomplished. In a helping device the sections are put together in the respective form. The last steps were soldering the cables and plug as well as shrinking the completed accu. As you can see, it's fitting well. Now to the locking mechanism of the removable canopy. It's done really quick. Then the rear balsa strip was glued to the given position and in the front edges of the canopy cutting, 2 triangles of plywood were fitted. For the attachement of the canopy, you have to press the rear section of the canopy, so that the glued strips can slide under the canopy cutting. A very simple method, but effectively and lightweight. On the last picture you can see the locked canopy. Props, spinners and motors are ordered. Till the parts arrive, I have to think about the camouflage. My conclusion: It's going on!! ;-)) |
 |